This Book is a Camera (really)
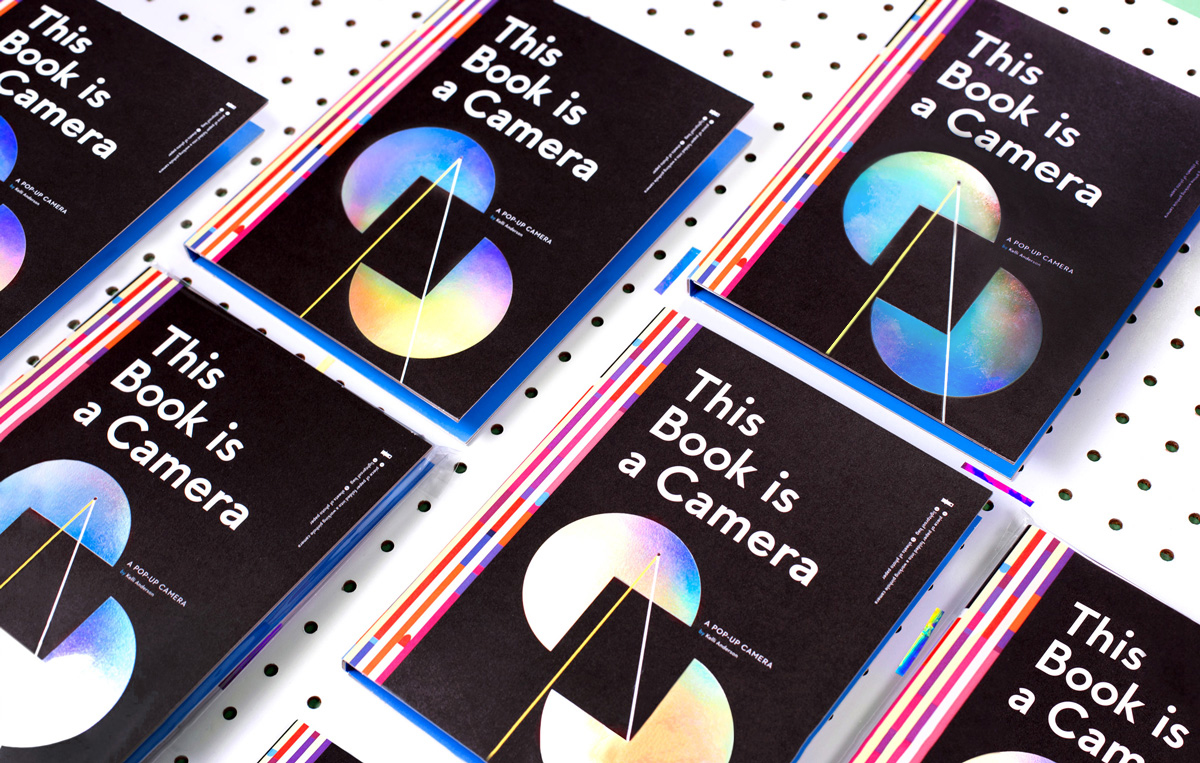
Book <--> Camera <--> Book <--> Camera — A dream project turned legit-thing-you-can-buy*! ^ (or make!)
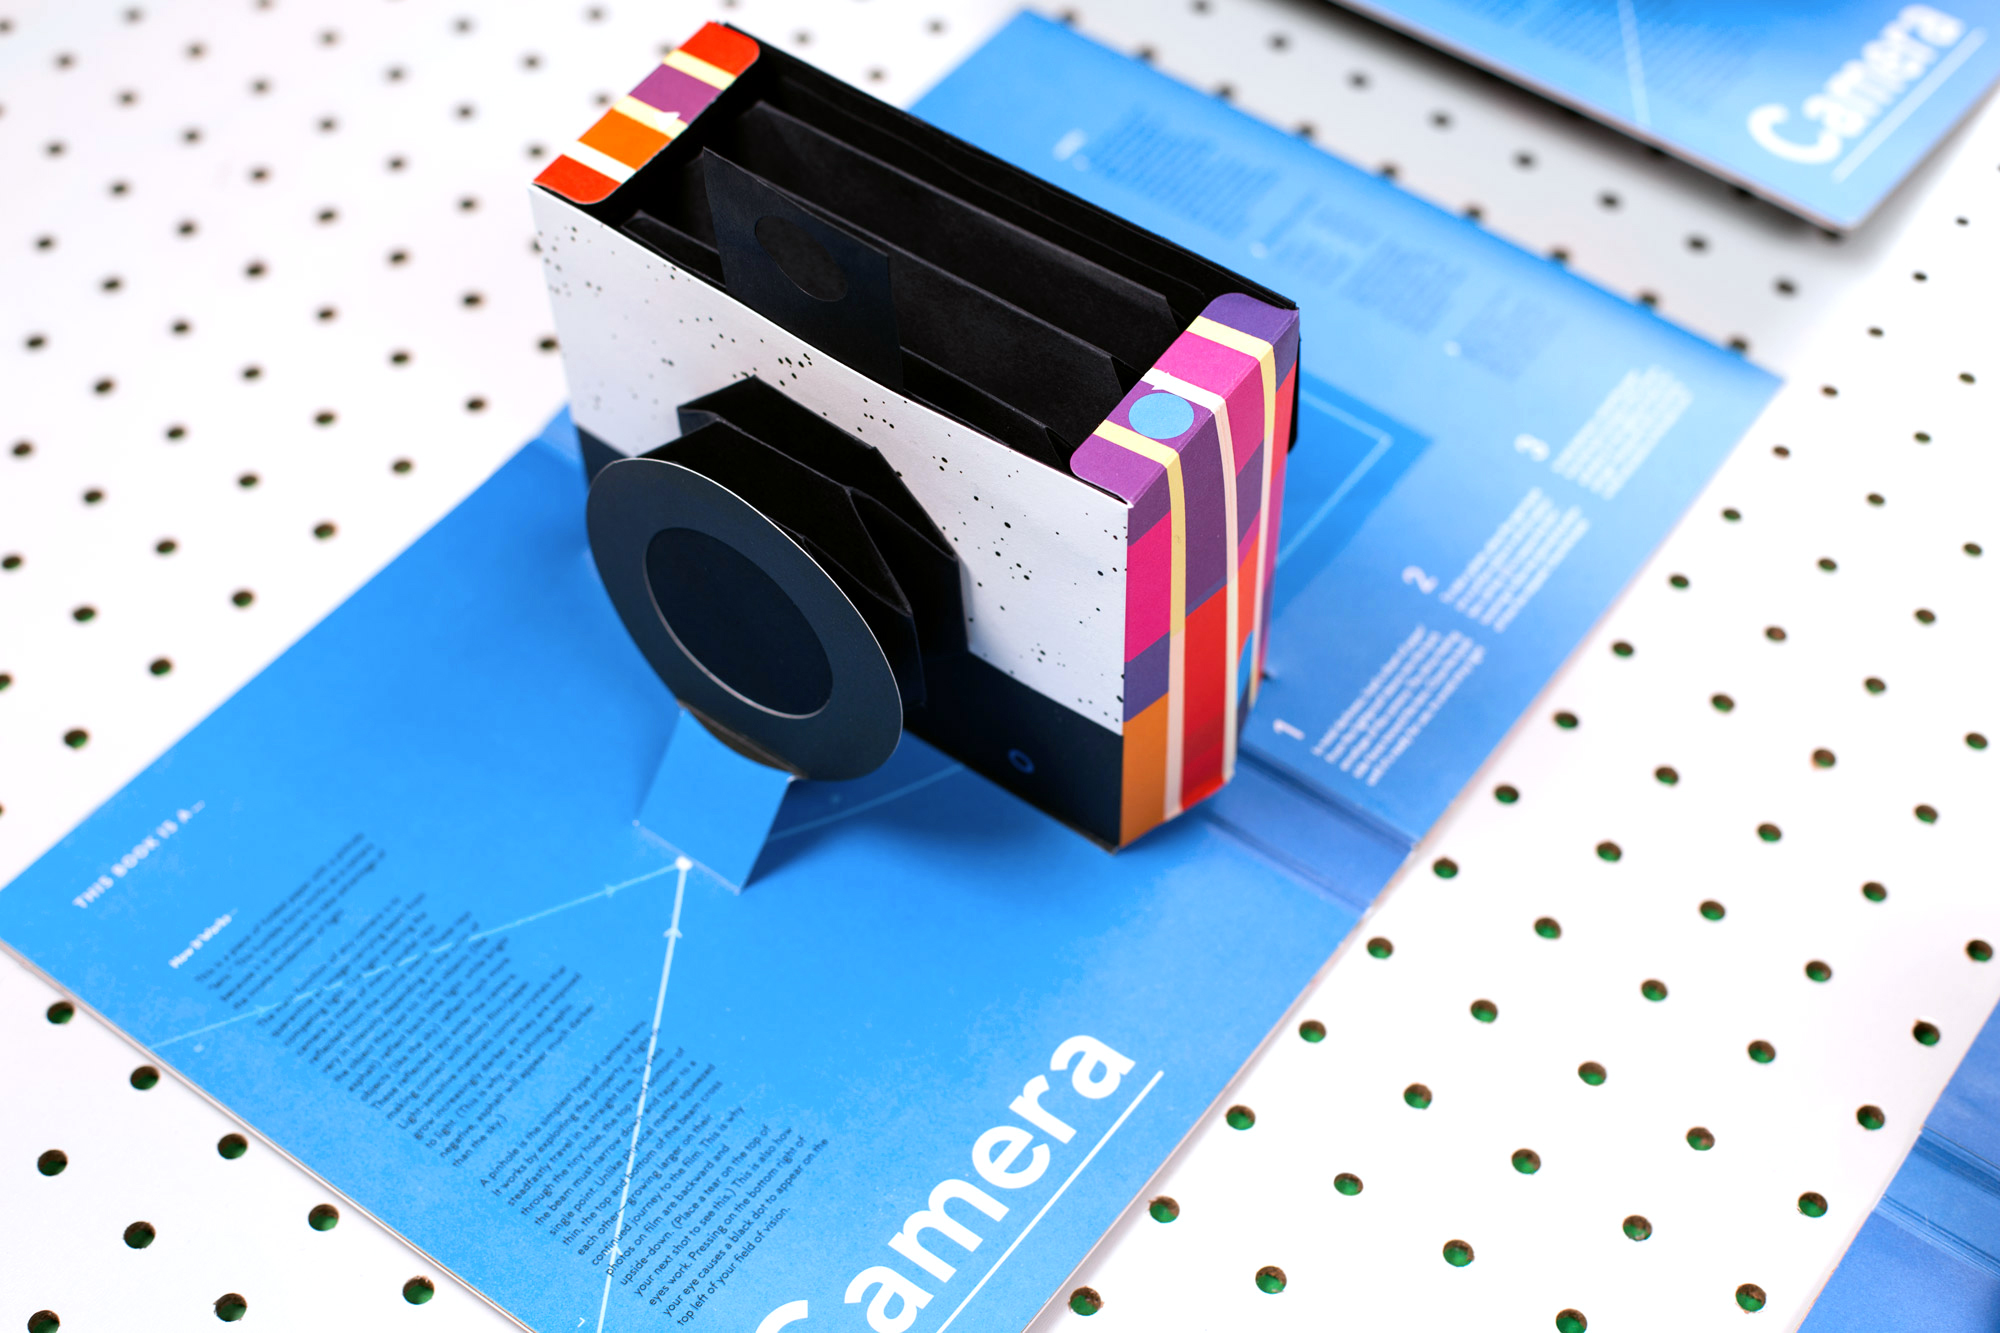
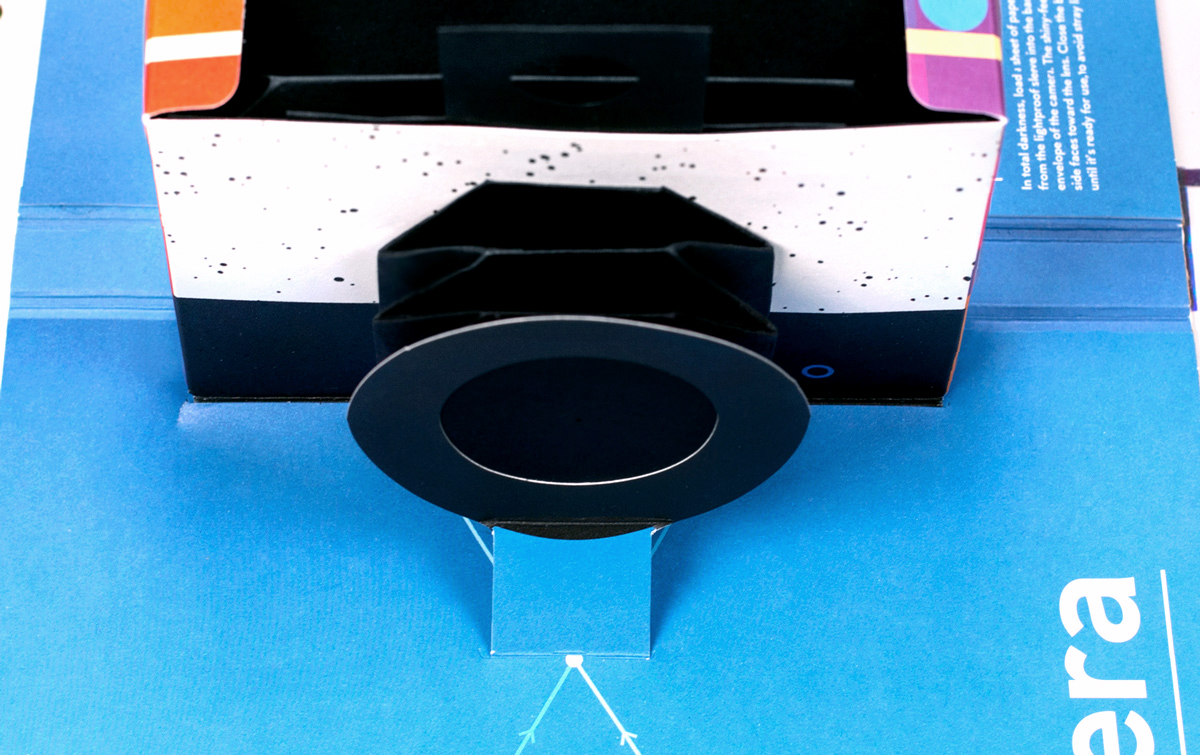
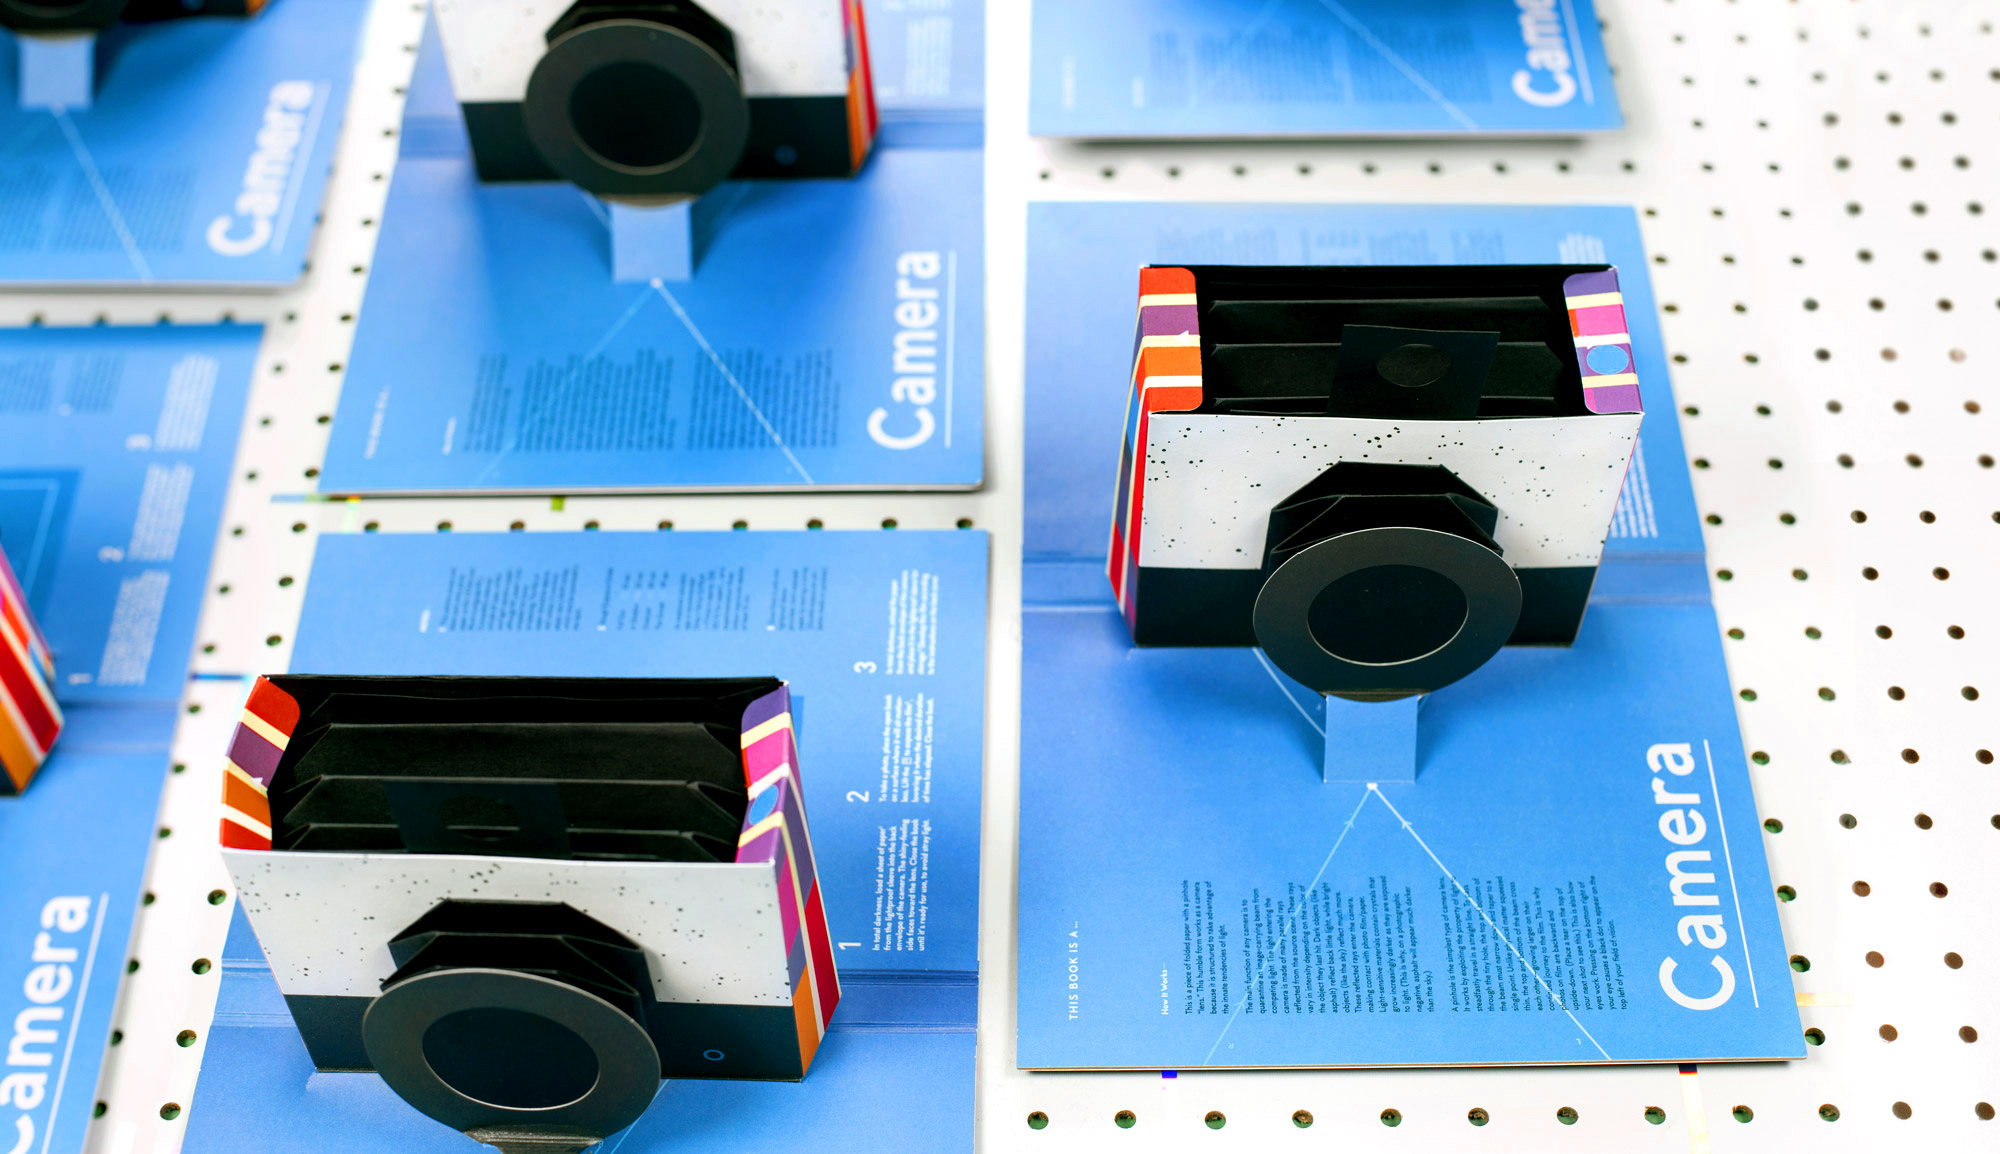
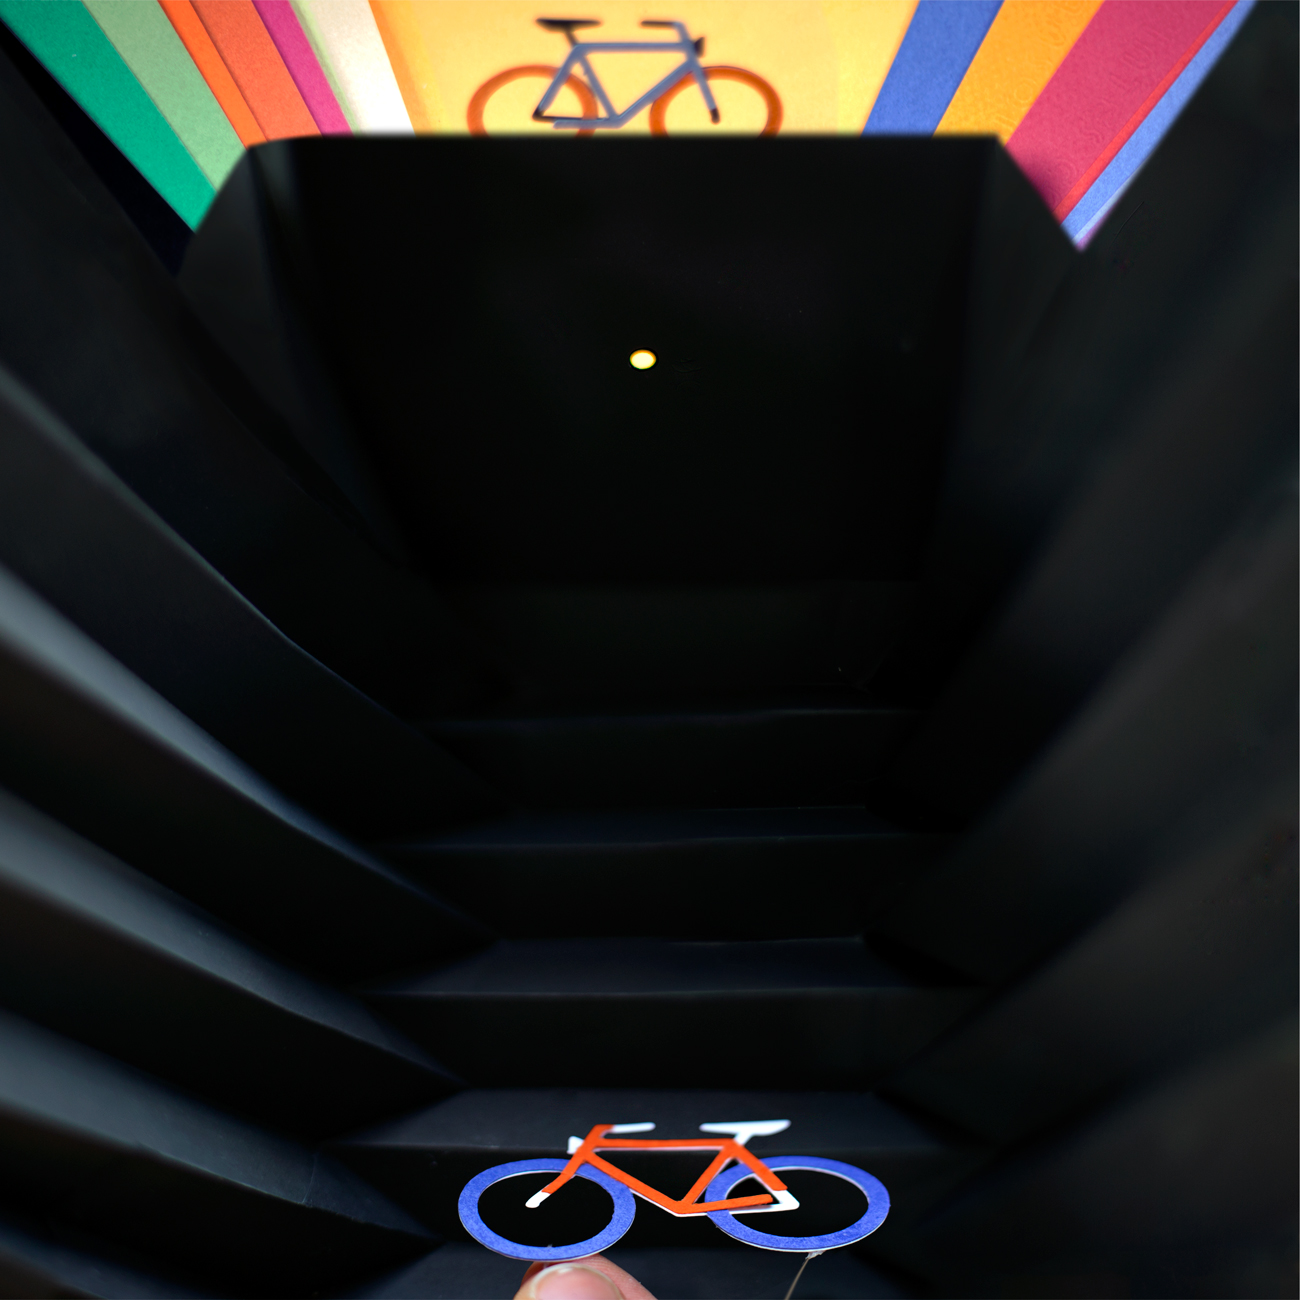
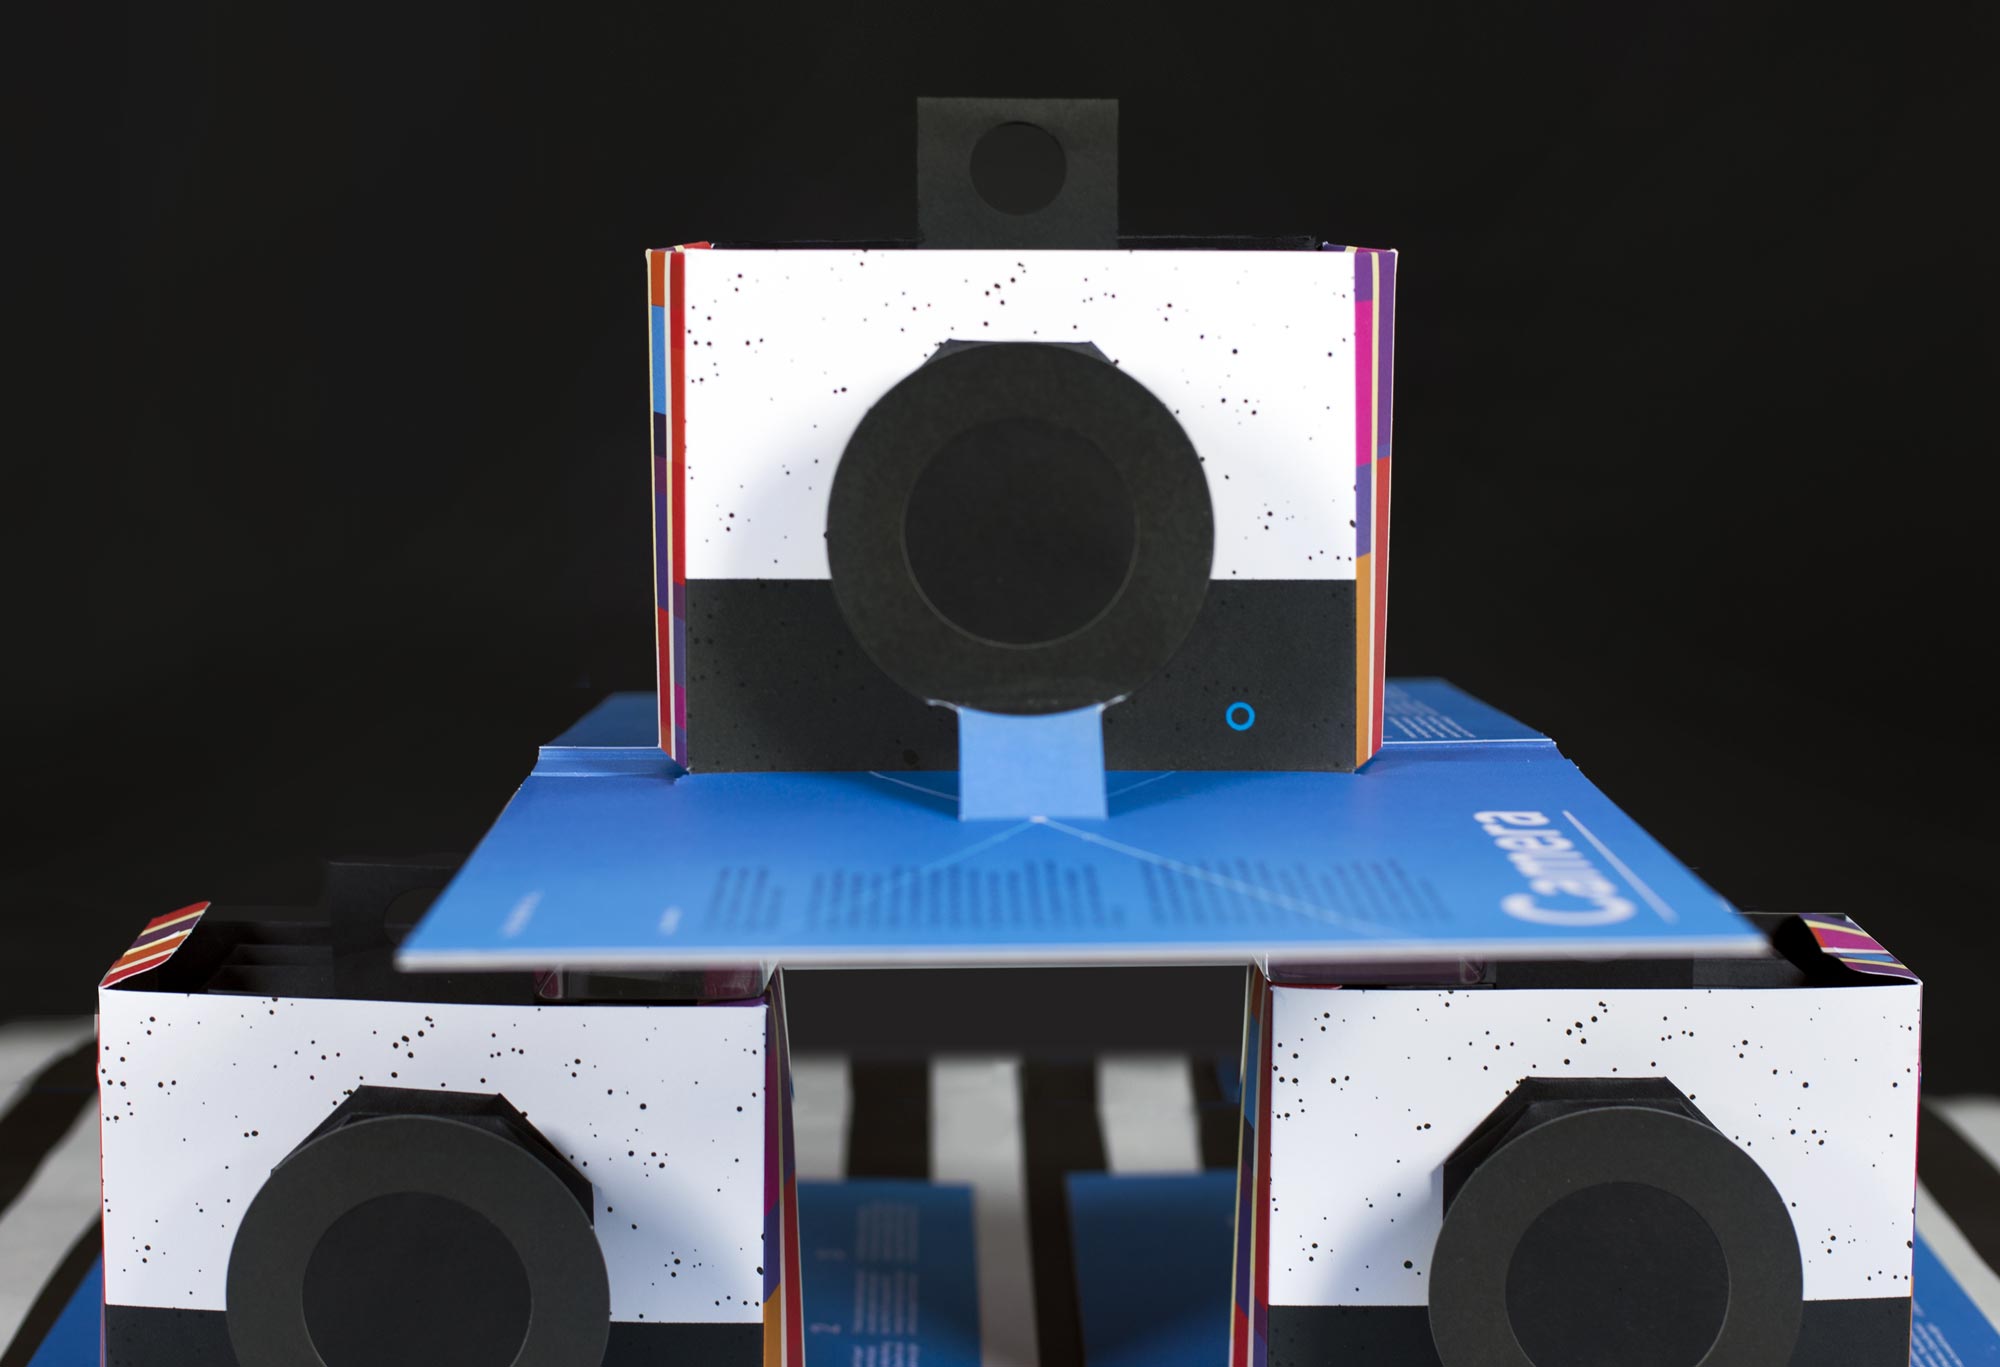
For the past couple of months, I’ve been searching for the right sequence of cuts and folds to turn a piece of paper into a camera. Specifically, I wanted to make a working camera within an educational pop-up book—one that connects the dots between design and science / structure and function. Happy to report: it is finally real! The final book explains—and actively demonstrates—how a structure as humble as a folded piece of paper can tap into the intrinsic properties of light to produce a photograph.
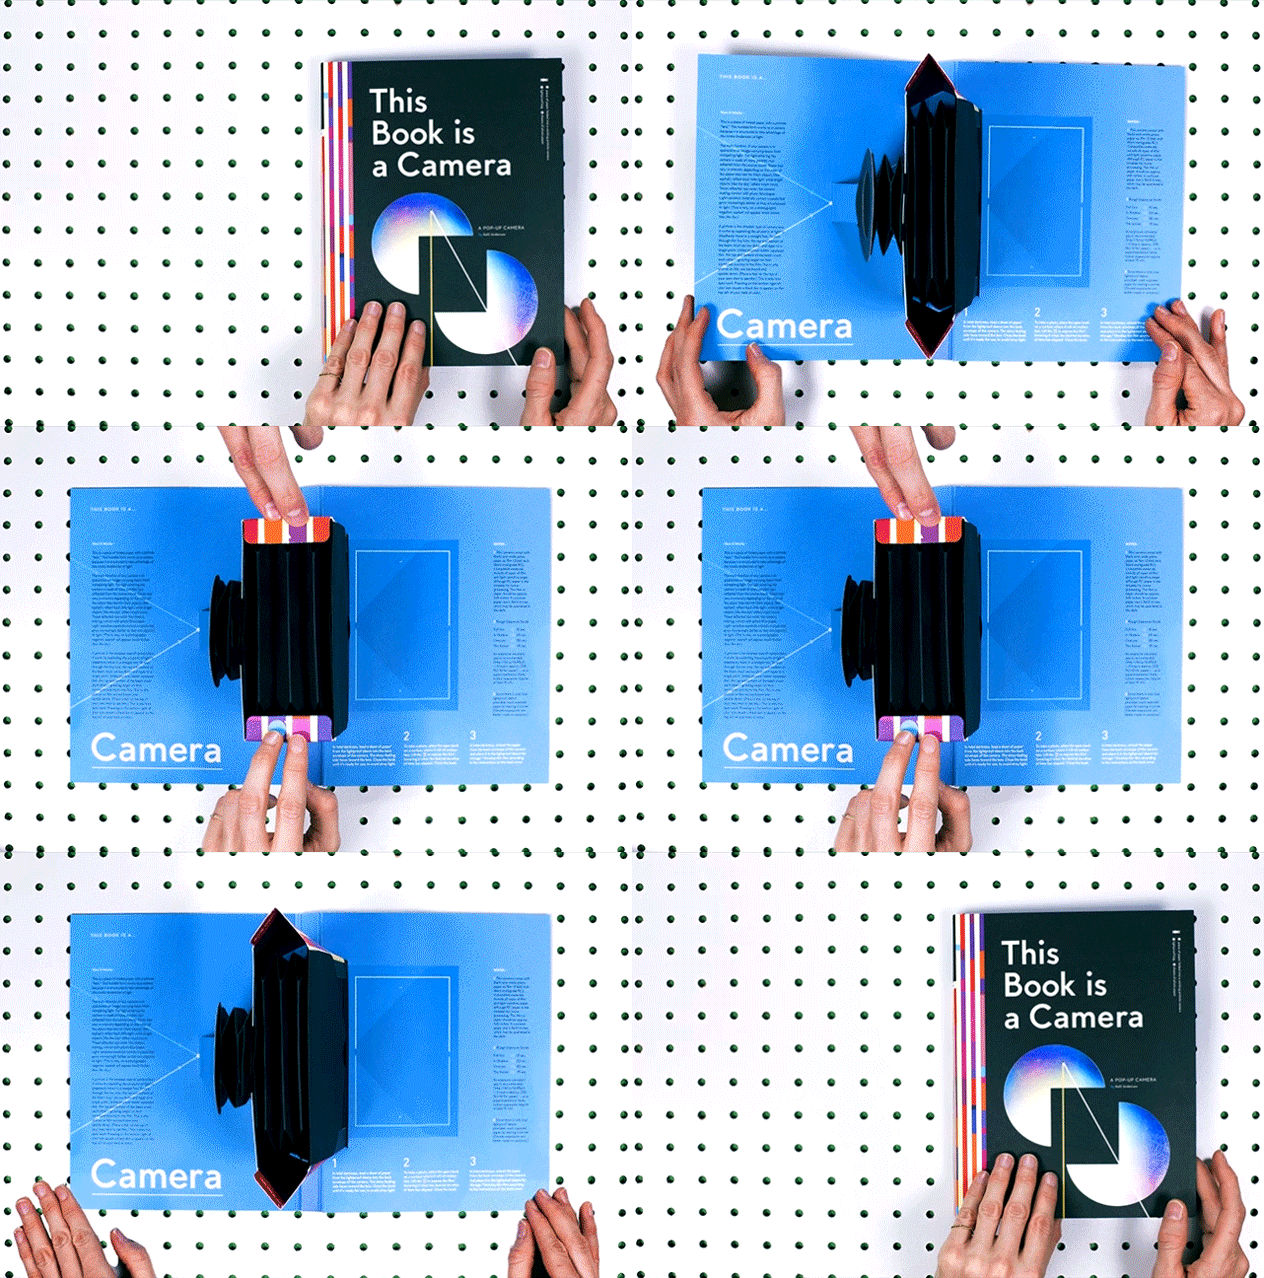
Here is how it works (detailed instructions typed out below.)
As far as 1800’s tech goes, pinhole photography is an great example of material acting as more than the sum of its parts. If you’re in the market to be blown away by something you normally ignore: make one over the holiday. You don’t need this book—all that you need is a lightproof box with a hole in the front (mini-hangtag safety pins yield a perfect 0.3–0.4 mm hole) and some light-sensitive material loaded in the back. The results achieved by such humble means is a feat of true cosmic piggybacking—showing that objects we make (even from the most lo-fi materials) can be structured to tap into impressive forces at play in our world.
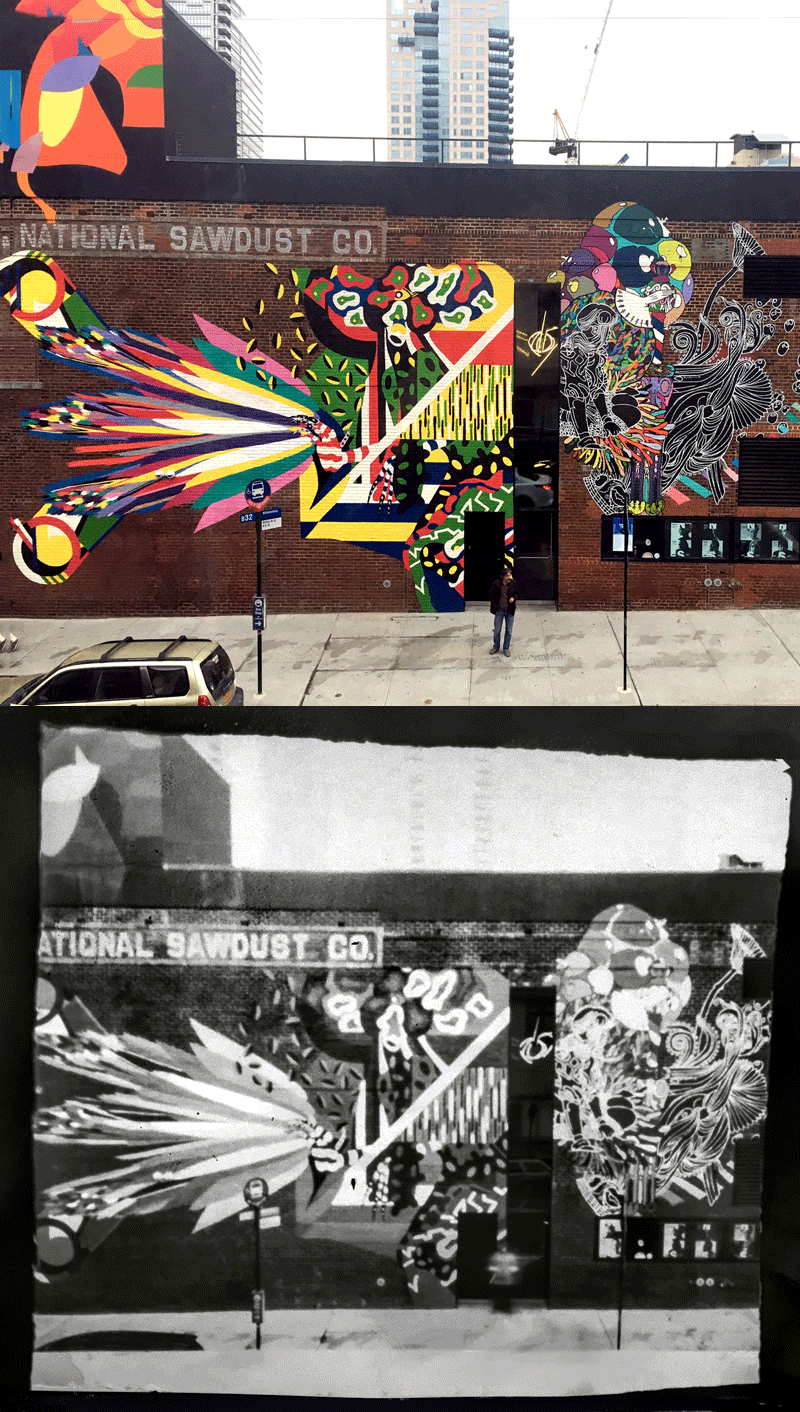
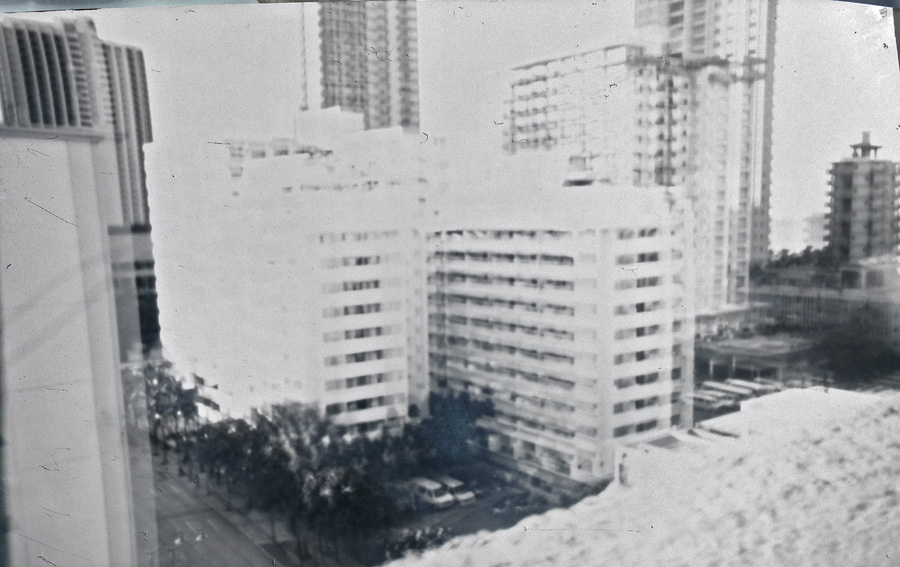
This is an example of the type of photo it takes. Photo taken with an iPhone versus photo taken with a folded-piece-of-paper-in-a-pop-up book:
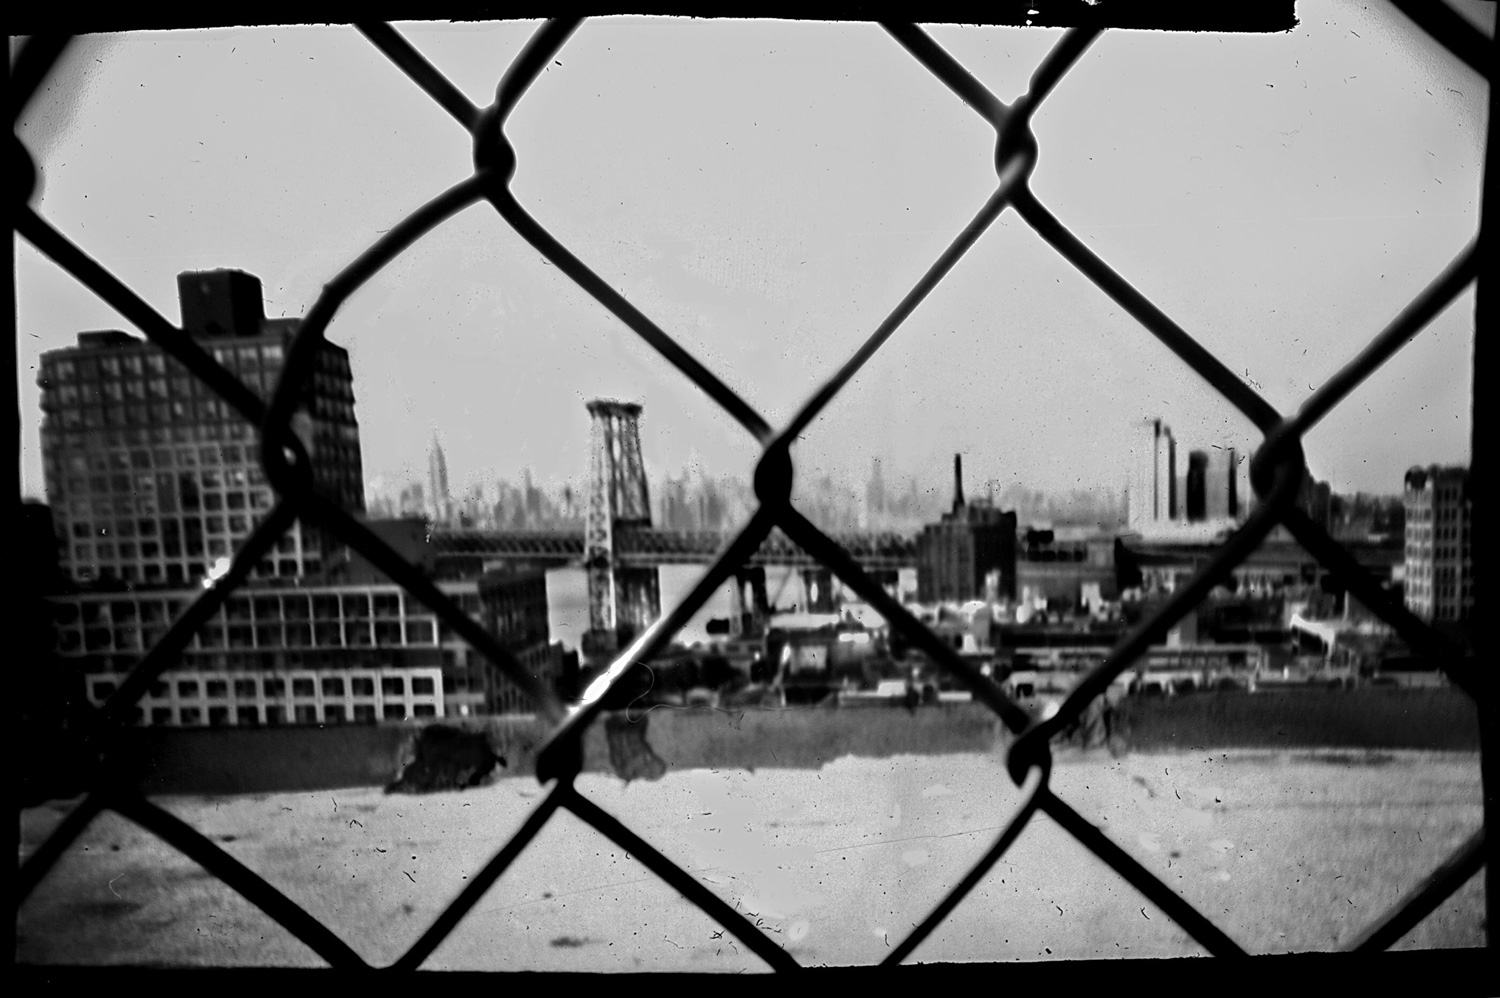
The convex surface of the lens of a normal camera merges light beams from a varying angles to produce focus at the focal point. A lensless camera accepts light through a single hole in a flat plane (from a single angle.) Because of this, there are no mechanics to “focus” a pinhole camera—it is a projection from a single beam, much like a camera obscura. The result is that objects near the camera and objects far away from the camera have the same exact amount of focus. Take this image of a fence, the Williamsburg bridge, and the Empire State Building—which is fuzzy, but each structure has an equal degree of focus:
To see more results: I’m posting sample photos taken with the cameras with #thisbookisacamera on the social things.
The book itself comes with detailed instructions and a starter pack of B/W Ilford photo paper (any 4×5” or smaller light-sensitive material can be used). There is nothing to assemble, but if you want to use it as more than a book, you need to feel alright with the concept of pouring developer into an old takeout food container and sloshing it around in the dark… while counting. Been prototyping this for a while, so this totally sounds like a normal human-in-a-dark-room activity. I tested it for a very long time and now my neighbors are probably questioning my sanity:
The project was supported in part by the Adobe Creative Residency (and produced in multiples by Structural Graphics).
Why it works
The reason why a hole in a lightproof box can perform a function similar to real photographic equipment is due to light’s intrinsic tendencies. Light steadfastly moves in a perfectly straight line. In a normal environment, light beams bounce around ambiently—their cacophony of trajectories eager to fog a piece of photographic paper with a muddy multitude of images.
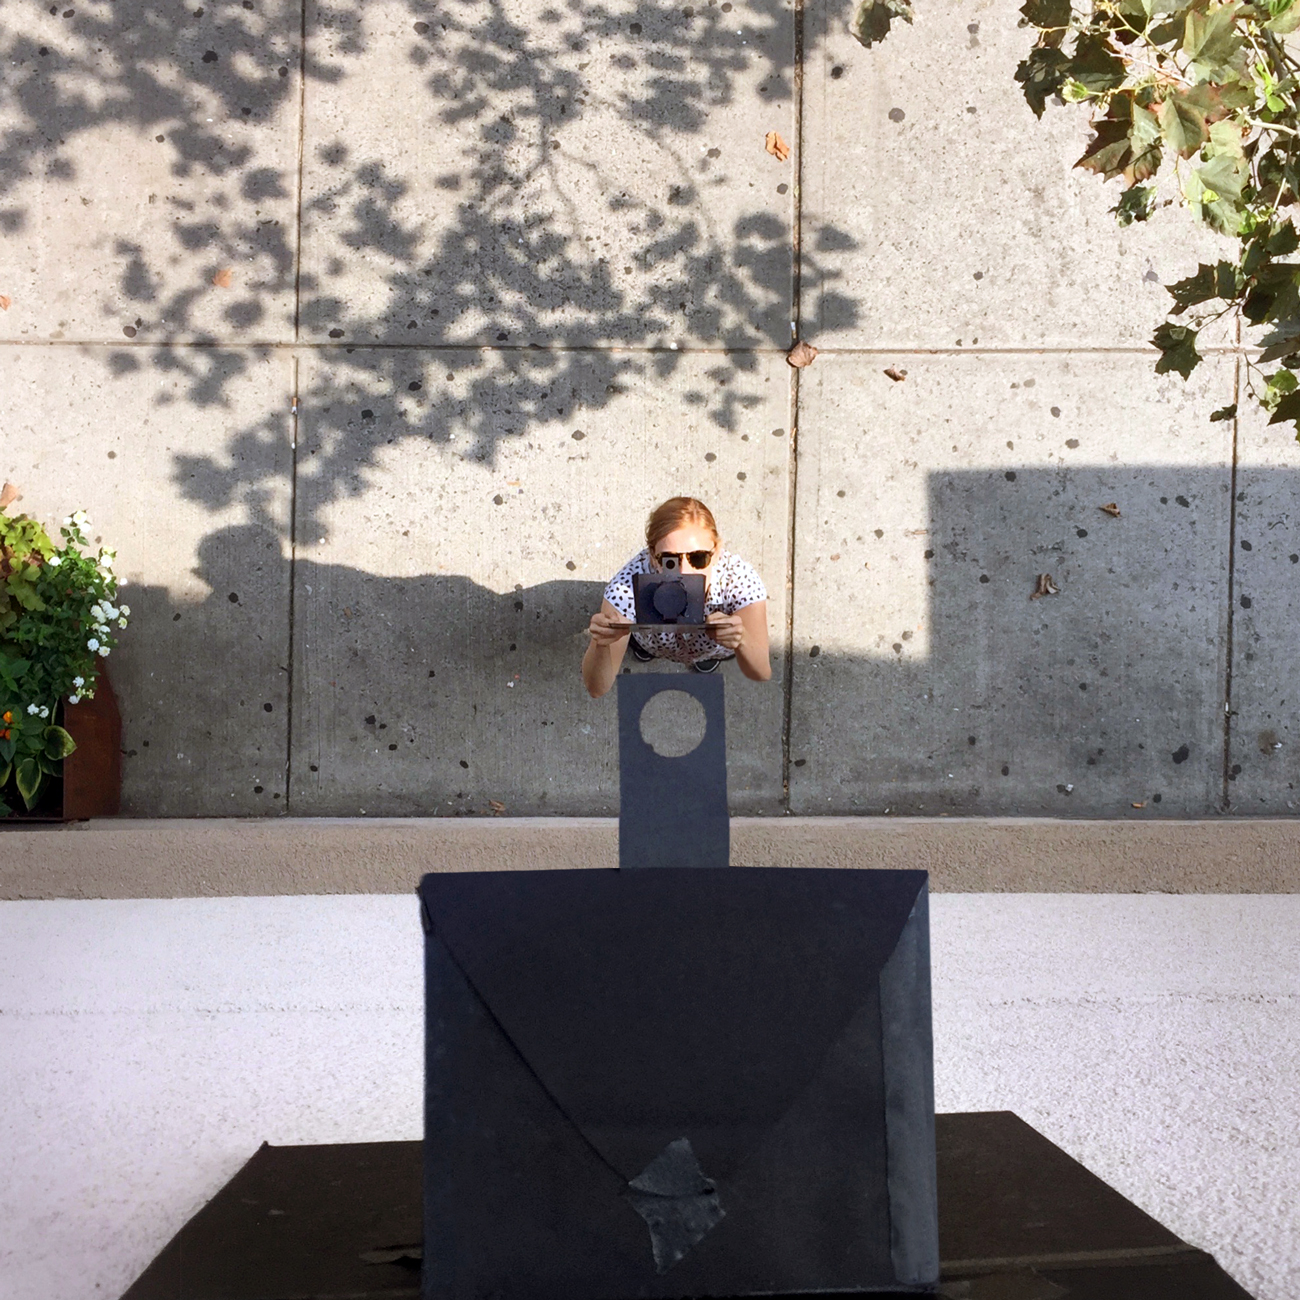
The chaos wrought by multiple beams became clear here—where I maladroitly forgot to patch a second pinhole I was testing. A double image was produced:
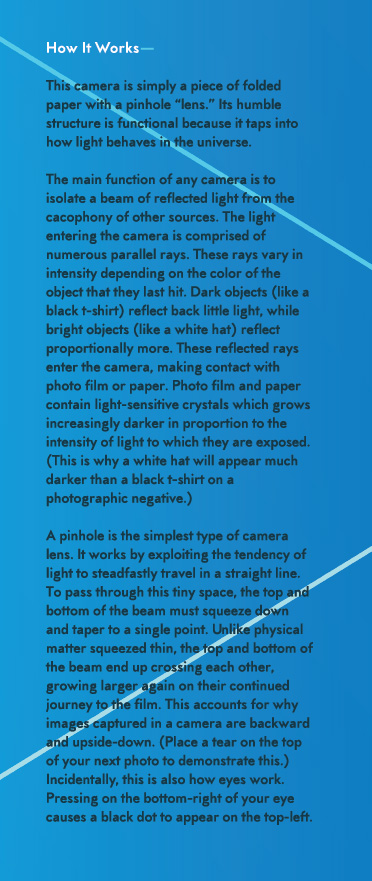
The book explains the tendencies of light beams this way:
But… Why?
Why work on some piece of antediluvian technology while sitting in a studio surrounded by high-tech tools like lasers, Graphtec cutters, and Illustrator?
For the past few years, I’ve been trying to better understand forces at play in the analog world through a process of subtraction. To do this, I’ve been disassembling everyday tools, stripping off their normal interface, and reducing them down to their functional minimums.
The value in this eccentric hobby is best illustrated with a past work-example: We frequently take for granted that music occurs because “we pushed play,” but what truly enables sound to reach our ears? In 2011, driven by sheer determination to recreate an experiment from a 1980’s Mr. Wizard episode, I made this paper record player invitation for my friends Mike and Karen’s wedding. Using only humble materials and handmade construction, this “device” corrals minute soundwave vibrations from a needle up into a paper tunnel, which in turn amplifies those waves into audibility. We knew this thing would be super-cool if we got it to work, but even we were surprised by the result. With a gesture, the paper device effectively demystified the exact thing that tech obscures: it syncopates the experience of sound with touch — demonstrating the different sensory ways that vibration manifests itself (a fact that is nevertheless difficult to grasp when stated verbally.) It essentially connected what we had been told was true about sound with what we could actually feel, firsthand.
Thinking with your hands—and showcasing the wonders of the physical world—turns out is addictive. I got hooked on the slow (but varied) thrills of paper engineering. In pockets of time between projects, I’ve devised fifteen functional, but rough prototypes for lo-fi pop-up devices that I hope to one day make real. Six of these contraptions will appear in a forthcoming book, which is being mass-produced by Chronicle. This Book is a Planetarium morphs from being a planetarium, to a spirograph, to a musical instrument, to a perpetual calendar, to a decoder ring, to a speaker. The pop-ups are supported by text connecting the dots between form and the hidden forces at play in the physical world. It will be at Barnes and Noble and Wal-mart and everywhere come Spring.
The remaining nine prototypes were deemed too complex for mass production. However, when the release of This Book is a Planetarium was pushed back*, I was eager to self-publish one of the rejects. This pinhole camera is one of those rejects— refined to stand on its own, but will also enhance the collection when it materializes. That is the plan.
(*I should mention: the planetarium book is still coming! Navigating the mass-production process is far more challenging than working directly with a printer.… but I have faith that it will eventually be great…)
How I’ve been prototyping a book like this
I began by hand cutting-and-folding rough sketches (the 3-D equivalent to napkin doodles), then refining the rough builds in Illustrator, outputting them to a Craft Robo cutter, then tinkering with them further using an x-acto knife. It is always a messy mash-up of analog intuition and digital refinement. Initially, I was convinced that some configuration of nested box shapes would yield a perfectly lightproof space (similar to the light traps one sees in darkroom entryways) — so I looked at (and dissected) many pop-up books involving boxes trying to find a way to implement this plan. (Def. regretted the book dissection, but after speaking with many pop-up experts: all pop-up books have the blood of other pop-up books on their pages.)
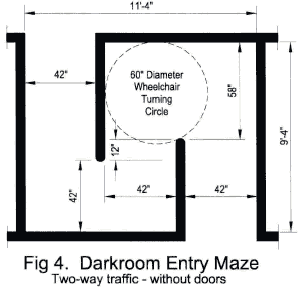
The problem with this approach: if you’ve ever peered into a halfway-open pop-up book, you know that many of the “solid” shapes fold flat by opening on at least one side. Pop-up books offer only the illusion of cohesive form. Like an anamorphic drawing, they are whole and complete only from a single vantage point (an open book.) For example, a pop-up cube folds back in two dimensions along score marks that bisect each of its sides. As the bends at those score marks become more pronounced, they raise up to reveal open triangles. This kind of pop-up technique would ruin an undeveloped photographic image, regardless of the amount of nested perpendicular boxes because the action is always syncopated to the opening/closing of the book. (If anyone has found a solution to this particular spatial riddle, I want to know about it and will update this post!)
To achieve a truly lightproof shape, the corners of the box must be scored and bent in addition to its top and sides. The resulting form is a bellows (like an accordion.) Basically: Had I initially looked back to the design of early cameras, I could have saved myself a ton of time. (Noted: history.)
Once I had a rough plan, I began drawing my score/cut lines in Illustrator (arranging them on separate layers so that I can output the score lines with 50% of the force of the cut lines.) This is a prototyping trick taught to me by Jeff Rutzky, who is a bit of a Craft Robo expert.
The funny thing about this line of work is how disappointing the whole process is… until one day, it miraculously isn’t. The only great camera that I made was the last camera. However, I prototyped and destroyed at least 50 of them until I found one that succeeded in accommodating easily-procurable film/paper types, yielded a book-sized book, collapsed to a not-ridiculously fat shape, resembled a camera, produced reasonably sharp photos, and didn’t cost more to produce than a reasonable sales price. None of these things automatically worked — each requirement was its own separate a battle. Once I had the structure determined, I photographed the blank dummy and Photoshopped-on a design.
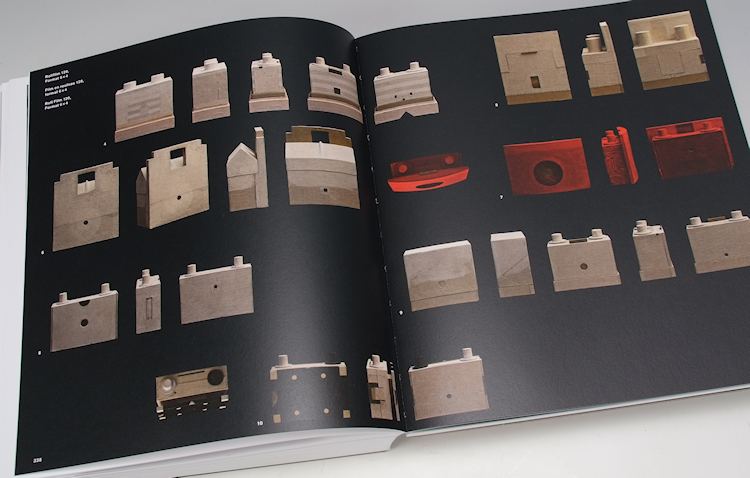
While researching, a friend recommended looking at Peter Olpe’s hundreds of different pinhole camera designs. The man is simply amazing: he is a Swiss graphic designer who has been crafting unique pinhole cameras for artists for years as a trade for their work. In his book, you witness the enormous effect that small design changes in the morphology of the camera body exert over the resulting image.
Make it yourself
Because of the potential for experimentation here, a DIY hand-assembly version of the dielines is published under a Creative Commons share-alike license. Please feel free to download the cut and fold lines to DIY it, to examine it, rip it apart, or to develop a completely new variation. (Although manufacturing your own version of the book to sell is not-ok.) Note: Use a thin, but truly opaque black paper. The book uses Mohawk Antique Vellum in Black in the lightest text weight, but Neenah’s Classic Crest text (in Black in the lightest text weight), and Curious Skin (in Black in the lightest text weight) also performed well in tests.
Download the template here.
Credits
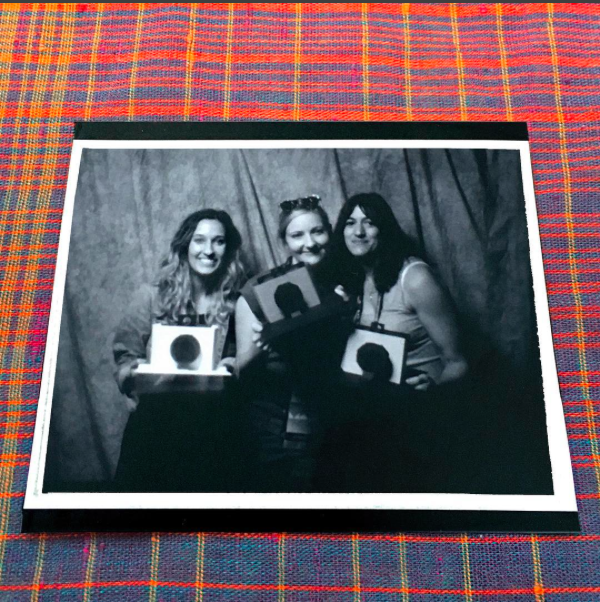
This project would have been impossible without the support and help of the Creative Residency team at Adobe, the patience of Daniel Dunnam, copy-editing of Charles Purdy, product advice from Rena Tom, Structural Graphics, hotel ice buckets for acting as makeshift development trays, and the ambient generosity of DIY enthusiasts who pour their wisdom into freely-accessible things like the Pinhole Design Calculator. We also set up a paper camera photo booth at Adobe Max and it was super fun and churned out almost 900 GREAT photos. The proof, taken with a paper camera, of course, of my Creative Residency co-conspirators Libby Nicholoau and Becky Simpson Murphy:
How to use it as a camera (detailed instructions)
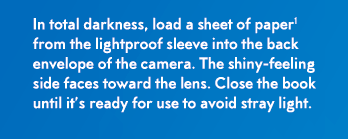
1.) Open the Book and lock the tabs to open fully
Achieving this specific focal length is important—the tabs also help to keep the book flat, rigid and hold steady.
Be sure to unlock those tabs before closing again! When bent backwards, they lose their functionality.
2.) Insert photo paper (or film…any light-sensitive material will do)
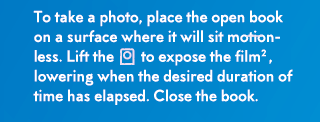
3.) Shoot a photo by raising the shutter for the desired exposure time.
Exposed photo paper will “keep” for months, so you can store your undeveloped photos in a light-tight envelope and develop them all at once if you want.
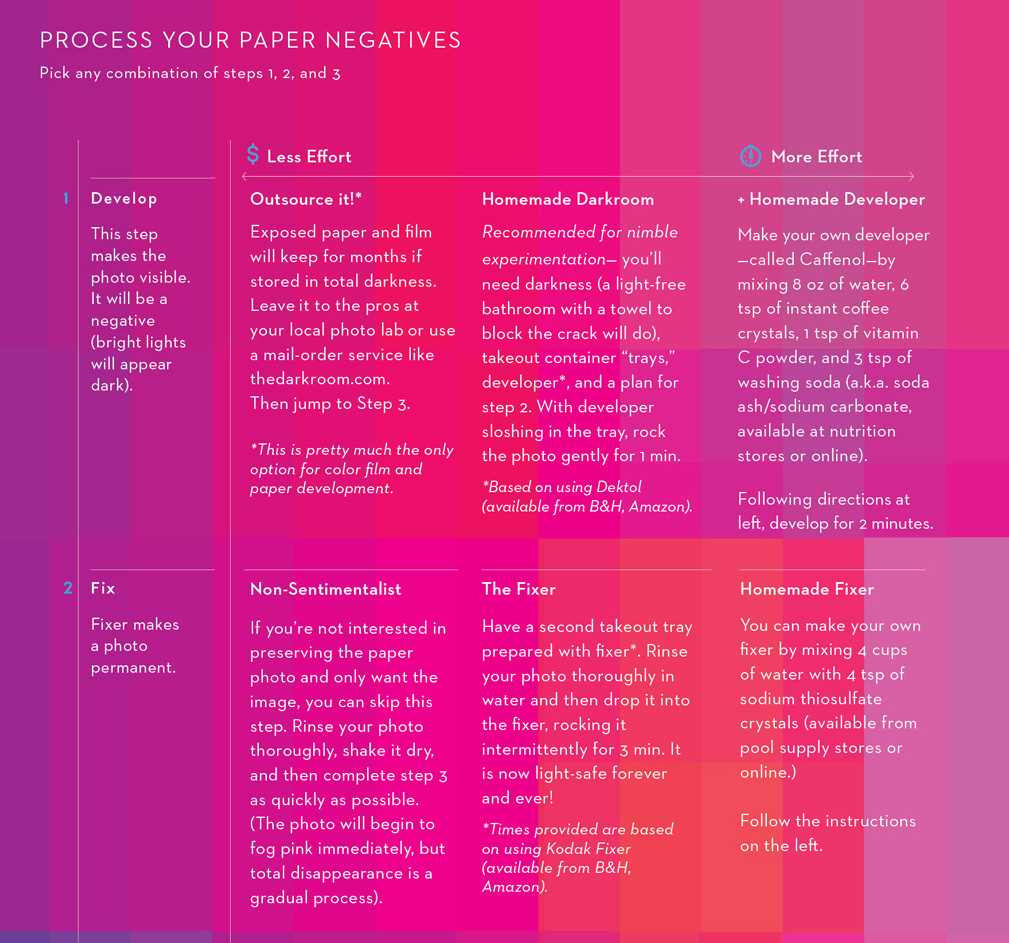
4.) Develop your photographic negative.
Be as DIY or as outsourcey as you wanna be. Here is a chart:
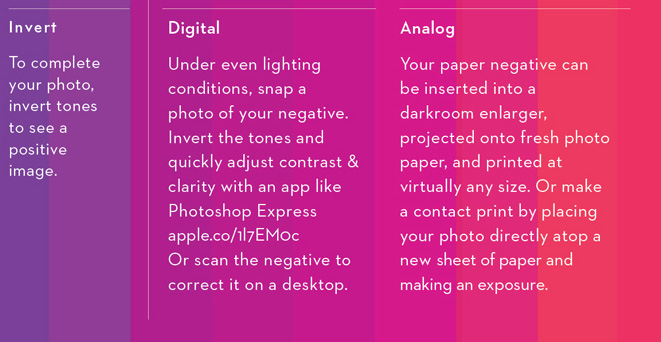
5.) Invert and correct it!
Analog cameras produce photographic negatives. The crystals in photo paper and film grow darker as they are exposed to light (so the sun will sow up as a black dot.) I’ve found that the easiest way to get from pinhole negative to corrected final photo is to snap the negative (in even lighting) and correct it with the free Photoshop Express app. (It is truly the most nimble way to get an image—been using it to prototype for months now as it is so much faster than scanning when you need a quick image.)
Some notes:
(Photography is an endless question-generating machine. Ask questions and I’ll put em in the FAQ below.)
User-submitted FAQ and further resources as they occur to me…
Q: Where do I purchase additional paper film?
A: Ilford’s 3.5 x 5 RC (resin-coated) paper is the easiest to use. However, you can also quarter standard 8×10 darkroom photography paper (in the dark!) or use standard large format sheet film (otherwise known as 4×5 film.)
Q: Does it only take black and white photos?
A: No. You can put any kind of light sensitive material into the camera and get a result! However, color photographs must be processed in the lab, which makes experimenting with exposure times less possible. The lack of immediate feedback from experimentation may yield a lower quality image. (Pinhole cameras are better suited for b/w photography as it enables a more nimble process of shooting, testing, adjusting, and shooting again.)
No related posts.




Amazing work! Hope you make the rest of the rejected projects – they sound intriguing:)
Ooooo, this is absolutely brilliant! I’ve made several pinholecameras and love the technique. And now it seems like you’ve taken it to a new level. Love it!
I’ve been following your work for some years now and you and your design still makes me smile.
Oh my gosh! This is the absolute best idea ever! Thank you for being so open and sharing your process! Design at its finest! I work in the Interior Design industry, and you just made my day. Can’t wait to purchase and share with people! Thank you!
Hi, How long would it take for you to ship this to Canada?
Hiya, it would take probably 5-6 days in the mail. Although I may not mail out until the 7th as there is a backlog of orders. The 12th-14th ish?
Hi, I like this project very much.
I just want to give a hint, in case you have photopaper left by accident in light, not all is lost.
You can put it into the camera and can exposure it by photographing the sun for some days. You will have Solarograms this way, without any development.
Best regards.
Bernd
PS: I like your book and recommended it at aphog forum and dslr forum for German pinholers.
Love the projects you work on, and even more so, the transparency about where these ideas come from and how they end up being actual products. Keep it up!
Thank you, Wes!
Hi,
Is this suitable as a gift to an 8 year old kid?
Thanks!
Michelle
Hi Michelle,
As an educational object and book, an 8 year old would have no problem with it. But as a camera, it is very helpful if either the child or the adult helping them has some darkroom experience. There are some basic concepts that get engrained when you take a photo class (like: no light can touch your film) which takes time and practice to become muscle memory. So it may be less of an age thing and more of a “has someone in the family taken a photo class?” thing. The book gives explicit instructions, but is no substitute for having the basics down pat through practice.
Thank you Kelli for your thoughtful reply. Her dad is an amateur photographer who use to develop his own films and pics so it should work.
Will it be reusable after using all the photopaper provided in the kit? How can I put the film inside the camera book? How long will it be shipped to Thailand?
Yes, in the blogpost and in the book itself, I’ve referenced a particular type of photo paper that is the exact right size for the camera. It is Ilford 3.5″ x 5″ RC paper. You may also quarter 8×10 photo paper, but this has to be done in the dark… so it is a little tricky.
I don’t know how long it takes to ship to Thailand. It is a 7.6oz package in a 10×12 standard sized bubble mailer. It is being shipped from US zip code 11249. If you want to pick a shipping method, I’ll gladly ship it using that service. Just put your info + the above info into a postage calculator and let me know which service that you want and how much it will be. I can send a paypal invoice for actual cost. Thanks again!
Thank you very much.
If I order now, could you ship the product right away, or this is the pre-order and I will get the camera book in February?
Hi P, I’m sorry—the initial printing of the book sold out in like a week. I won’t have more until February, which is why I changed the checkout cart thing to say “preorder.” Really sorry about this!
Kelli
Hi Kelli !
This project is amazing !! It looks like so much fun !
I’d like to give it as a gift for Christmas, but I live in France, so I’m not sure it will be there on time if I order now.
Can you enlighten me on that matter ?
Thank you 🙂
Thank you. I am shipping all of the cameras on Dec. 4th and 5th. The post office indicates that there is a 4-10 day shipment time to all locations in the US depending on how far away yo are from NYC (where I am based.) Hope that helps!
Ok, I’ll give it a shot 🙂
Hi, i want one of your books camera for a christmas gift. Im from mexico, so would you ship to mexico? If the answer will be yes i´ll be making the payment inmediatly! Hope you can help me!
And another thing, how many days do the ship take to méxico?
Thanks! and congratulations for your amazing project.
Indeed! Just put your address into paypal and it auto-calculates the shipping to Mexico. I’ll send it out on Monday and the post office says that it will take “4-20 days” (apologies about the range.) Because it is the holidays, mail should be faster than usual, so I’d say that yes, it will probably be there before Christmas
You get my vote for the most creative card of the year – well done!!
Hello Kelli,
This is a very unique and awesome idea! I’m glad you were able to pull this off! 🙂
I ordered one and I was curious if we would receive any kind of notification when you’ve had the chance to ship these?
Thanks Jason. It took me by surprise that all of them were claimed so quickly, so it has been a bit of an adventure in shipping supplies over here. But-they will go out the 9th at the latest. Realize it would be very disappointing for many people if they didn’t arrive for xmas
inspiratif sekali, membuat kamera dari kertas dan buku, karya yang inspiratif 🙂
You are such an inspiration!! Such amazing work every single time!! I love it!!
Hi Kelli – I am so excited to receive these. I received a tracking order saying the books I ordered were set to ship out soon after Dec 3rd. But I haven’t been able to track on the USPS website as there haven’t been updates. Can you confirm if my order was part of the initial order? I had ordered 15. thank you.
Hi Kelly! Thank you. I actually threw out that original label and decided to ship yours via priority mail (since you had ordered 15, so: insurance, presumed speed, etc) If it doesn’t arrive tomorrow, let me know and I’ll start doing more detective work! My email is my firstname [at] firstnamelastname dot com
Thank you – I will check in with them tomorrow morning to confirm its arrival. This is so cool – I can’t wait to try them out! And excited to give some away to share the experience!
hi Kelli,
I’ve just received your camera/book and it really is as awesome as I thought.
thanks so much!
Yay! let me know if you have any questions or feedback. Enjoy!
Hi Kelly i found this project while working on a pinhole camera of my own!
is great what you achieved, but i have a question
Does your camera actually work with only paper?
isn’t there a aluminum or tin foil with the perforation?
i wonder if it can ve done using paper only
Best regards from Liechtenstein!
d.
Hi Daniel, Thanks. Yes- I was surprised too! All of the instructions to make a pinhole camera recommend metal. But in my tests, the paper-with-a-hole-in-it actually yielded sharper images. Crazy, I know!-K
Really, no metal needed? so which one is this whole in the DIY file ? the one in the front lens?
i feel like it’s quite big for sharp images! 😀
p.s. what is the circle piece with a cross for?
Hey Daniel,
So happy to hear you’re making it! (And:Thank you for identifying a problem with the file!) The circle with a cross is—indeed—misleading. That cross does not indicate a cut line, as the template would lead you to believe. The cross marks the point where the pinhole is intended to go. I’ve updated the DIY.pdf file, so re-download it and let me know if it is clear. The circle with a cross in it must be made out of the lightproof black paper, but is glued onto a larger lens structure that helps it stretch out when the book is opened. Holla if you encounter an issue 🙂
Kelli
HI Kelli!
I found this project and i’m placing an order,
However it wont be here for christmas and
i’m making it as a present for my son, i will make a
mockup with the DIY but i have a problem, i don’t know where to
position the ‘pinhole’, in the very front, or right after the movable shutter
Could you please clarify this ?
Best regards from México
🙂 Thanks for asking– I’ve updated the DIY.pdf file to show where the pinhole goes (a big OOPS on my part) Hope you guys have fun with it!
Hi Mrs. Kelli, I am making this camera as a senior project for school but I don’t really understand the template. I watched the folding video but it looks like some of cutouts are different, can you help me?
Hi Kelli
This is a great creation!
We’ve dedicated an article to it on our website!
https://cameracheck.be/camera/dit-boek-is-een-camera/
Kind regards
CameraCheck
OMG…. this is fantastic!
Want to give it to my husband as birthday present. Do you also ship to Italy and how long does it take?
I mean, if I pre-order today and you will ship it late Feb, do you think I will be able to receive it in 10-20 days?
Thanks!!!
Hi Silvia! Thank you. I think that the best way to do this is… I’m going to let people know that the books are here via social media and my newsletter (promise this isn’t a newsletter-joining ploy! Just an alternative to me individually emailing everyone) When I send out that announcement, email me myfirstname@myfirstnamelastname dot com and remind me of the exact date you need it by. I’ll make sure it will get there in time. Newsletter is tinyletter.com/kellianderson
Awesome! Thanks for the quick answer and for the good news.
I already subscribed to your newsletter a few hours ago when I left the comment here 🙂
So … Now I’m going to pay and pre-order this amazing camera!
Thanks thanks thanks Kelli.
Have a wonderful week!
Silvia
Does the camera come with developing fluid and fixer?
Hi Tim, The book comes with paper negatives, but you must either use traditional photo chemistry or make your own homemade developer (from instant coffee and baking soda) to develop it. There is a recipe on the back of the book. I haven’t been using fixer. I’ve just been photographing the negatives with my iphone before they turn pink and fade away. Anyway, here are all of the instructions from the back of the book, so you can see what is involved:
SUPER NÁPAD
SUPER
hi.I love your products very much, but I can’t buy. Can you help me ?Look forward to your reply, thank you![translation] from Google
Hello Kelli,
I live in France and I’m going on vacation soon in New York, is there any place where I can buy it ?
Hi Kelly,
I received your fab book as a gift last month (I live in Italy) I love it. I tried to take a picture and tried to develope it using household ingredients. It came out allmost all white (or light brown) what could have gone wrong? I followed the exposure time. I waited a while before developing so the paper remained in the book for few days. Could that be it?
Thank you! Arianna
Hi Arianna,
Oh no! That is too bad. A photo with nothing on it is probably underexposed (too little light hitting the paper.) On a cloudless day at noon, you must leave the shutter open for about 10 seconds. But on that same day, the sunset may require an exposure time of a whole minute or two to properly capture the scene. I would try taking a photo on a very bright day first, as a test. Using the iPhone app exposure meter is helpful too- although I’ve found that it underestimates the exposure time needed when it is dark. So “increase your exposure time.” Two other possible issues: 1.) ensure the slick/ sticky feeling side of the paper faces the pinhole 2.) make sure you baked your baking soda (unbaked baking soda has not undergone a necessary chemical change.). Don’t hesitate to write of you have any more issues! I hope you enjoy it!
Kelli
Nejde mi to. Urobí to len akúsi ciaru.
Hello! I am excited to order this pinhole camera pop-up book! This is soooo creative and amazing!
How long would it take a time to ship this to South Korea?
And, would you check the shipping fee ?
I just paid only $29.
Plz send email to me.
Thanks.
Hey, really cool project! I saw this and so I wanted so build one myself, but I don`t know, how to get opaque paper. So I wanted to ask, if someone can help me.
(Sorry, my englisch is really bad)
Thank you very much 🙂
Hi Frieda!
Awesome. Do you have an art supply store where you live? If you turn on a flashlight and try to shine it through the paper, you can tell if the black paper is opaque enough. If the light is unable to shine through to the other side, it will work! (I normally use the flashlight on my phone to test). I hope that helps! Kelli
I adore it!. It’s very great!
couple of days ago, artist and designer Kelli Anderson published a new book titled This Book is a Camera. As the title suggests it’s a pop-up book